What Colors Make Copper Paint? A 5-steps DIY Guide for Artists and Decorators
Ever fallen in love with copper’s warm, metallic glow but struggled to replicate it yourself? Whether you’re an artist adding depth to your canvas, a DIY enthusiast revamping furniture, or a decorator refreshing home accents, creating copper paint can feel like a bit of a mystery.
The good news? Copper's beauty lies in its simplicity, and with the right guidance, you can achieve that rich, radiant hue at home. This blog is your step-by-step guide to making copper paint from scratch. We’ll explore the basics of color theory, the specific color combinations needed, and some tips to nail both the texture and finish. Let's get started!
Table of content
- The Appeal of Copper Paint
- Understanding Color Theory Basics
- Primary Colors Needed to Make Copper Paint
- Step-by-Step Guide to Mixing Copper Paint
- Tips for Achieving the Perfect Copper Shade
- Exploring Copper Finishes and Effects
- Troubleshooting Common Issues
- Creative Project Ideas Using Copper Paint
- Unleash Your Creativity with Copper Paint
The Appeal of Copper Paint
Copper paint holds a unique place in design and art. Its earthy hue balances sophistication with a natural feel, making it perfect for accent pieces, wall decor, and even canvas work. Unlike gold or silver, copper brings warmth, making spaces feel both trendy and inviting. Plus, it pairs beautifully with neutral tones and jewel tones alike, offering endless design possibilities.
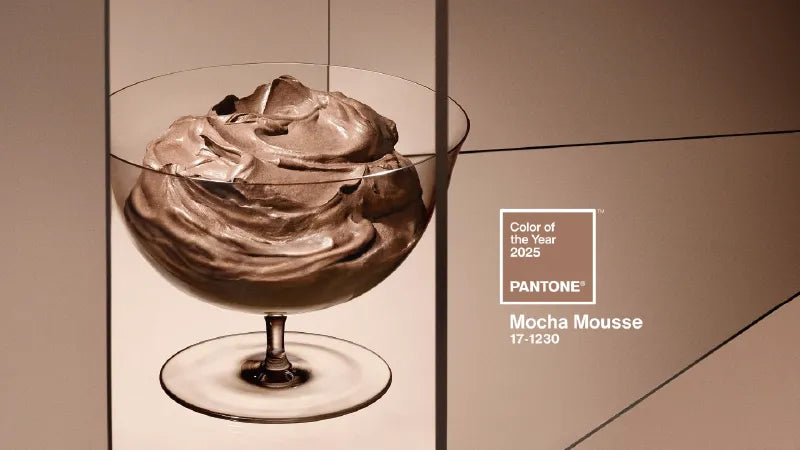
Interestingly, the 2025 Pantone Color of the Year, PANTONE 17-1230 Mocha Mousse, is one of the stunning shades of copper paint. Instead of searching high and low for the perfect pre-made copper paint, why not create it yourself? Not only will you save money, but you’ll also gain the freedom to customize it to match your exact needs.

Understanding Color Theory Basics
Before we mix paints, a quick refresh on color theory is key. Copper, unlike primary colors (red, yellow, and blue), is classified as a secondary or tertiary color. Its base is a combination of warm red or orange hues, balanced by yellow and sometimes a touch of brown to deepen its metallic warmth. Here’s a simplified breakdown to keep in mind:
- Red + Yellow = Orange
- Orange + Brown = Copper
Understanding this blend of warm colors will help ensure you achieve the perfect copper shade.

Primary Colors Needed to Make Copper Paint
To make copper paint from scratch, you’ll need these basic colors in acrylic, oil, or watercolor form (depending on your medium):
- Red (Preferably a warm red, like Cadmium Red or Scarlet Red)
- Yellow (A vibrant yellow, such as Cadmium Yellow)
- Brown (A rich brown, like Burnt Sienna or Umber)
Optional for extra shine or depth:
- Metallic Gold or Bronze accents
- White to lighten the shade
These fundamental colors work as your base, and adjustments allow for endless customization of tone and texture.
Step-by-Step Guide to Mixing Copper Paint
Step 1: Prepare Your Workspace
Lay out your paints, palette, brushes, and a mixing knife. Ensure you also have a surface to test your paint, such as scrap paper or cardboard.

Step 2: Create a Base Orange
Start mixing equal parts of red and yellow to form a base orange. Use small amounts at first to ensure you don't waste paint.

Step 3: Add Brown for Depth
Gradually mix in pinches of brown until you notice the orange deepening into a copper hue. Burnt Sienna works excellently for achieving that subtle reddish-brown tinge seen in real copper. Go slowly here; too much brown can muddy the color.

Step 4 (Optional): Add Shine with Metallic Gold
If you want your copper paint to have metallic luster, mix in a small amount of metallic gold or bronze paint. Blend thoroughly for an even finish, testing on your surface between adjustments.

Step 5 (Optional): Adjust for Lightness or Warmth
- If the color feels too dark, mix in a small amount of white paint to lighten it.
- If it looks too dull, add a touch more red or gold to warm it up.
Once satisfied, test the final paint mixture on your desired surface to ensure it dries to the desired tone.

Tips for Achieving the Perfect Copper Shade
- Layer Gradually: Always mix and test small amounts of paint before committing to larger batches.
- Use a Palette Knife: This ensures even blending of different colors and prevents streakiness.
- Have a Reference: Compare your mix to a photo of copper to guide your adjustments.
- Seal Your Paint: If creating copper paint for furniture or home decor, use a sealant to ensure durability and sheen.
Exploring Copper Finishes and Effects
Copper paint’s versatility isn’t limited to color alone. Here's how you can enhance its brilliance with different finishes and effects:
- Metallic Finish: Achieve this with an extra layer of metallic gold or bronze over your copper base.
- Aged Patina Effect: Add a wash of diluted teal or green paint for a weathered, oxidized copper look.
- Matte Finish: Mix in a matte medium for a muted, modern aesthetic.
Experimenting with finishes is a great way to bring depth and character to your painted piece.

Troubleshooting Common Issues
- Problem: Your copper looks dull or flat.
Solution: Add a touch of metallic gold or adjust with a brighter red or yellow.
- Problem: The paint dries darker than expected.
Solution: Lighten the mixture by incorporating white or adjusting your brown tones.
- Problem: It doesn’t shine.
Solution: Consider switching to metallic paints or layering metallic powders over your mix.
Creative Project Ideas Using Copper Paint
Now that you’ve mastered making copper paint, here are a few ideas to get creative:
- Furniture Accents: Refurbish cabinet handles, picture frames, or lamp bases with a copper finish.
- Wall Art: Create abstract art using copper tones paired with blues or teals for contrast.
- DIY Decor: Make custom vases or candle holders by painting over plain glass or ceramic.
- Custom Paint by Numbers: Use copper paint to elevate your custom paint-by-numbers projects.
- Seasonal Crafts: Use copper paint for ornaments, wreaths, or even greeting cards during the holidays.
Your copper paint can bring warmth and sophistication to a variety of projects.

Unleash Your Creativity with Copper Paint
From elegant home decor to stunning art pieces, the possibilities with copper paint are endless. By following our step-by-step guide and experimenting with finishes, you’ll master the art of copper in no time. Need more tips on color blending or creative DIY projects? Subscribe to our email list for inspiration straight to your inbox. Now, grab your paints and start creating your next masterpiece!


