
The Complete Diamond Painting Guide: Everything You Need to Know (2026 Edition)
Whether you've stumbled across a glittering finished piece on Pinterest, spotted someone working on one during a flight, or simply want a new creative hobby that won't require years of practice to enjoy — you've come to the right place. This is the most complete diamond painting guide you'll find online, covering everything from the absolute basics all the way to advanced techniques, finishing, and display.
Let's dive in.
What Is Diamond Painting?
Diamond painting is a craft hobby where you apply tiny, faceted resin gems — called "drills" or "diamonds" — onto a pre-printed, color-coded adhesive canvas to create a shimmering mosaic-style artwork. Think of it as a combination of paint by numbers and cross-stitch, except the results sparkle brilliantly in the light and no brushwork or threading is required.
You may also see it called "5D diamond art" or "diamond embroidery" online. The "5D" name comes from the five facets on each side of the diamond (for a total of 15 facets), which gives the drills their distinctive light-catching quality. Despite the fancy terminology, the process itself is wonderfully simple: find the symbol on the canvas, match it to the correct color of diamond, and press it into place. Repeat until the image is complete.
Diamond painting is suitable for all ages and skill levels. No prior art experience is needed. If you can follow a color chart and keep a steady hand, you can create a stunning finished piece.

A Brief History of Diamond Painting
Diamond painting originated in Asia in the early 2010s, drawing heavy inspiration from existing needlework traditions. It rose to mainstream popularity in Western markets around 2017–2018, largely driven by social media sharing and online craft communities. Today it is one of the fastest-growing hobby categories worldwide, with a passionate global community of crafters who share their works-in-progress and finished pieces across Facebook groups, Reddit, TikTok, and Instagram.
The craft has evolved significantly since its early days. Canvas quality, adhesive technology, and drill precision have all improved substantially. Today's kits offer sharper image resolution, better color accuracy, and more diamond varieties than were available even a few years ago.
Why Do People Love Diamond Painting?
Before getting into the how-to, it's worth understanding why this hobby has captured so many people's hearts.
It is deeply relaxing. The repetitive motion of picking up a diamond and pressing it into place creates a meditative rhythm that many crafters describe as therapeutic. For those who struggle to sit still and "do nothing," diamond painting provides a productive anchor for downtime — your hands are busy, your mind quiets, and the result is something beautiful.
It is genuinely satisfying to complete. Unlike many hobbies where progress is slow to see, diamond painting shows results quickly. Even an hour of work transforms a blank section of canvas into a glittering image. That visual feedback loop keeps crafters motivated.
It requires no artistic talent. This is not a gatekept hobby. The design, color selection, and layout are all handled for you. Your job is simply to execute it — and the canvas guides you every step of the way.
It produces wall-worthy art. Finished diamond paintings are genuinely beautiful objects. When framed and displayed, they catch light in a way that oil paintings or prints cannot. Many crafters have replaced store-bought artwork with their own diamond paintings.
It is accessible and portable. A diamond painting kit can be worked on at a kitchen table, on a lap desk on the sofa, or taken in pieces on a trip. You don't need a dedicated studio or expensive equipment.
Understanding the Terminology
Diamond painting has its own vocabulary. Here are the key terms you'll encounter:
• Drills — The resin diamonds themselves. The term "drill" is used throughout the community as a synonym for the individual gems.
• Canvas — The base of the painting. It is printed with a grid of symbols and covered with a pressure-sensitive adhesive layer, which is protected by a film you peel back as you work.
• DMC Codes — A standardized color numbering system borrowed from the embroidery world. Each color of diamond has a DMC number printed on its bag, which corresponds to a symbol on the canvas. This is how you match the right color to the right spot.
• Round Drills — Circular-shaped diamonds with a flat bottom. They are easier to place and more forgiving of minor misalignment, making them ideal for beginners.
• Square Drills — Four-sided diamonds that fit together perfectly edge to edge with no gaps, creating a more polished, seamless mosaic effect. They require more precision and patience.
• AB Drills (Aurora Borealis) — Drills with a special iridescent coating that creates a rainbow, color-shifting effect when light hits them from different angles. They are often used as accents within a painting.
• Special Drills — Beyond round and square, some kits now include shaped drills such as stars, hearts, flowers, and moons, often used decoratively in select areas of the design.
• Full Drill — A painting format where the entire canvas surface is covered with diamonds, leaving no blank areas of the printed design exposed.
• Partial Drill — A painting format where only certain sections of the image are covered with diamonds, while other areas are left as a printed background. This style is less common and generally considered less impressive in finish.
• Multi-Placer / Multi-Drill Tool — An applicator tool with a wider tip that can pick up multiple drills simultaneously, useful for filling large areas of a single color more quickly.
• Wax Pad / Wax Caddy — A small container of adhesive wax used to coat the tip of your applicator pen so it can pick up drills. Without this, the pen tip has no grip on the diamonds.
• Stylus / Applicator Pen — The pen-shaped tool you use to pick up and place drills. Most kits include both a single-tip and a multi-tip version.
• Light Pad — A backlit tablet placed beneath the canvas to illuminate symbols, making it easier to read the pattern — especially helpful for complex designs or crafters who work in lower light.
• Sealer — A liquid applied to the finished painting (usually with a brush or sponge) to bond all diamonds permanently to the canvas and protect the surface.

What Comes in a Diamond Painting Kit?
A quality diamond painting kit should include everything you need to complete the project without buying additional supplies. Here is what a well-equipped kit typically contains:
• The canvas, rolled or folded, printed with the full design and color symbol grid, with adhesive surface protected by a clear film.
• The roll of diamonds, pre-sorted by color and packaged in individual resealable bags labeled with their DMC code.
• A single-tip applicator pen and a multi-tip applicator pen.
• One or two wax caddies.
• One or two sorting trays with ridged bottoms to help align drills for easier pick-up.
• A small pair of tweezers for adjustments and correcting misplaced drills.
• Extra resealable bags and DMC sticker labels for organizing leftovers.
Some kits also include a straightening tool (used to align square drills after placement), spare drill bags, and a reference booklet. Premium kits may add a light pad or protective carrying tube.
One thing to check before purchasing: make sure the kit is labeled as including all tools. Some cheaper kits sell the canvas and drills only, leaving you to source tools separately.
Round vs. Square Drills: Which Should You Choose?
This is one of the most common questions new diamond painters ask, and the answer depends on what you value most.
Round drills are faster and more forgiving. Because they are circular, a slightly off-center placement still looks fine from a distance. They are ideal for beginners, for crafters who want to work quickly, and for designs with a lot of fine detail where the small gaps between circles are less noticeable. The downside is that close up, you can see tiny spaces between each drill where the canvas shows through. For most display purposes — especially pieces viewed from arm's length or more — this is not an issue.
Square drills create a seamless, wall-to-wall coverage that looks polished and complete even at close range. When aligned correctly, they click together satisfyingly with no visible gaps. The finished result is often compared to a fine mosaic or stained glass. However, squares require more care during placement. A misaligned drill will leave an obvious gap or crooked line, and fixing mistakes is more time-consuming. They are recommended once you have developed confidence with the process.
If you are brand new to diamond painting, start with a round drill kit at a smaller size — around 30x40cm — to learn the workflow before committing to a large square drill project. If you are experienced and want the most striking finished result, square drills are worth the extra effort.
How to Choose Your First Kit
The sheer variety of available kits can be overwhelming. Here is a practical framework for making a good first choice.
• Start small. A 30x40cm or 40x50cm canvas is a manageable introduction. Large paintings (60x80cm or more) can take dozens of hours and are better saved until you know you enjoy the process.
• Choose a design you genuinely love. You will be spending many hours with this image, so pick something that brings you joy — a favorite animal, a landscape you find beautiful, or a color palette you love living with.
• Check the drill shape. As discussed above, round is better for beginners.
• Verify it is full drill. Partial drill kits have their fans, but a full drill painting produces a more impressive finished result.
• Look at image resolution. A quality canvas converts the source artwork into a high-resolution symbol grid. Blurry or low-detail symbol printing makes the work harder and the finished result less satisfying.
• Check the drill count. More colors generally means more detail and a more realistic image. Beginner kits often feature 20–30 colors; advanced designs may include 60 or more.
• Consider canvas coating quality. The adhesive layer should be strong enough to hold diamonds firmly without you needing to press too hard, and it should not dry out quickly when the protective film is removed in sections.
Setting Up Your Workspace
A good workspace makes the entire experience more enjoyable and protects your work. Here is how to set one up properly.
• Choose a flat, stable surface — a table rather than a couch cushion. Diamonds that roll off a wobbly surface are frustrating to recover.
• Make sure your lighting is good. Natural daylight is ideal. If you work in evenings, a daylight-temperature lamp positioned at an angle to the canvas will help you read the symbol grid without eye strain. Many experienced painters add a light pad beneath the canvas for extra clarity.
• Keep your tools within reach. Set up your sorting trays, wax caddy, pens, and tweezers at a comfortable working distance before you begin.
• Organize your drills before starting. Rather than searching for the right bag mid-session, spend a few minutes laying out the bags you plan to use for each session in DMC code order, or in small cups, egg carton slots, or a bead organizer. This small investment of preparation time pays off many times over.
• Keep pets and small children at a safe distance. Diamond drills are tiny and scatter easily. A knocked-over sorting tray is one of the most common (and most frustrating) diamond painting mishaps.
Step-by-Step: How to Complete a Diamond Painting
Here is a detailed walkthrough of the full process from unboxing to finished artwork.
• Step 1: Unbox and inspect your kit. Lay out all contents and account for every bag of drills. Cross-reference the bag labels with the symbol chart on the canvas to make sure all colors are accounted for. If any bags are missing, contact the seller before you begin — running out of a color mid-project is one of the most common frustrations.
• Step 2: Flatten the canvas. Many canvases arrive rolled and need time to flatten. Place the canvas face-up on a flat surface and lay heavy books on top for several hours, or overnight. Do not use a hair dryer or iron directly on the canvas, as this can damage the adhesive.
• Step 3: Study the color chart. Spend a few minutes familiarizing yourself with the symbols printed on the canvas and matching them to your drill bags. Some painters use a highlighter to mark colors they have already found on the chart.
• Step 4: Prepare your first color. Pour a small amount of one color of drills into a sorting tray. Tap or gently shake the tray so the drills settle right-side up, flat-bottom down. This makes them much easier to pick up cleanly.
• Step 5: Load your applicator pen. Press the tip of your applicator pen into the wax caddy. You only need a thin, barely visible coating of wax — not a large glob. The wax gives the pen tip enough tack to pick up a single drill without sticking to it permanently.
• Step 6: Peel back a small section of film. Do not remove the protective film from the entire canvas at once. Peel back only enough to expose a small working area — roughly 10x10cm or a section covering a single color block. This prevents the adhesive from drying out or picking up dust, lint, and pet hair.
• Step 7: Begin placing drills. Touch the tip of your loaded pen to the flat top of a drill in the tray. It should pick up with minimal pressure. Carry it to the corresponding symbol on the canvas and press it gently but firmly into place. For round drills, a simple centered press is enough. For square drills, align the edges carefully before pressing.
• Step 8: Work systematically. Most experienced painters work in one of a few patterns: bottom-to-top (to avoid resting your wrist on completed sections), color by color (completing all instances of one color before moving to the next), or section by section. Try different approaches to see what feels most natural and efficient for you.
• Step 9: Use the multi-placer for large areas. If you have large sections of a single color, the multi-tip applicator can pick up three or six drills simultaneously, significantly speeding up those areas.
• Step 10: Secure drills as you go. Periodically place the removed protective film back over completed sections and roll gently with a clean rolling pin or brayer. This presses drills firmly into the adhesive and prevents loose pieces from shifting. You will hear a satisfying clicking sound as drills seat properly.
• Step 11: Fix mistakes with tweezers. If a drill lands in the wrong spot, is placed upside down, or gets stuck sideways, use tweezers to lift and reposition it before the section is pressed flat. Misplaced drills on un-pressed sections are easy to correct; once pressed, they are harder to remove without disturbing neighbors.
• Step 12: Complete the painting. Continue section by section until every symbol on the canvas has a drill on it. For large paintings, this process may take anywhere from 15 to 100+ hours spread across many sessions.
• Step 13: Do a final press. When the painting is complete, cover the entire surface with the protective film and roll firmly over the whole canvas using your rolling pin. Pay extra attention to edges and corners, which tend to receive less pressure during regular work.
Pro Tips and Tricks
These are the practical insights that experienced diamond painters wish they had known at the start.
• Never peel all the protective film at once. This is the most important rule in diamond painting. Even a few hours of exposed adhesive can collect enough dust and fibers to significantly reduce its holding power in those areas.
• Work with good posture. Diamond painting sessions can stretch long, and hunching over a flat table takes a toll on your neck and back. Raise your work surface if possible, or use a tilted stand or clipboard propped at an angle.
• Use a light pad. Even if your eyesight is perfectly good, a light pad placed beneath the canvas makes the symbol grid dramatically easier to read, especially on complex multi-color designs. Many painters consider this the single most impactful upgrade to their setup.
• Label everything. When you finish a session and pack away your drills, make sure every bag is sealed and labeled. Mixing up two similar shades — like DMC 310 (black) and DMC 3799 (very dark grey) — is a headache that can require extensive rework.
• Store leftover drills properly. After finishing a painting, you will almost always have leftover drills. Store them by DMC code in labeled bags or small containers. Over time you will build a personal stash that can fill in gaps on future projects or be shared with other crafters.
• Don't stress over small gaps. Especially with round drills, minor spacing inconsistencies disappear entirely when the painting is viewed from a normal display distance. Step back and assess your work from at least 1 meter before deciding anything needs fixing.
• Work in good light and take breaks. Eye strain is real. If symbols start blurring or you find yourself misplacing drills more frequently, it is a sign to take a break. Even ten minutes away helps reset your focus.
• Color by color versus section by section. Working color by color — placing all instances of one DMC code before moving to the next — is generally faster because you are repeatedly doing the same motion. Section by section keeps your workspace tidier. Both are valid; experiment to find your preference.
Troubleshooting Common Problems
Canvas won't lie flat
Place under heavy books overnight, or sandwich between two flat boards and leave weighted for 24 hours. Never apply heat directly to the canvas surface.
Adhesive is picking up lint and hair
This happens when the film is removed too early or left exposed too long. Use a piece of tape or lint roller to gently lift debris from the exposed adhesive before placing drills. For future sessions, peel less film at a time.
Drills aren't sticking
The adhesive may have been exposed too long, or the canvas quality may be low. Apply gentle additional pressure to drills, and during the final press, use a rolling pin with firm, consistent strokes. If specific areas are persistently bad, a tiny drop of craft glue can be used as a spot fix.
Running out of one color
Contact the seller for a replacement bag. Quality brands maintain color inventories specifically for this purpose. In the meantime, move to another section of the canvas to keep progressing.
A drill is placed upside down
Upside-down drills look dull instead of sparkling. Use tweezers to flip them before pressing. If already pressed, you can still use tweezers or a craft knife tip to gently lever the drill up, flip it, and re-press.
Canvas creasing after storage
Roll the canvas loosely around a tube rather than folding it for long-term storage. Folds create permanent creases that can be difficult to flatten.
Finishing Your Diamond Painting
Once all drills are placed and the final press is complete, many crafters choose to apply a sealer to permanently protect the painting. Sealer bonds the drills to the adhesive and to each other, preventing any from loosening over time and protecting the surface from dust and handling.
There are two main types of sealer: water-based brush-on sealers and spray sealers. Water-based sealers are applied with a soft brush or sponge in gentle strokes, being careful not to move any drills. They typically dry clear and can be applied in multiple thin coats. Spray sealers are faster but require even application to avoid puddling.
Important: look for a sealer specifically marketed for diamond paintings, or a multi-surface decoupage glue that dries clear. Some sealers can cloud or dull the sparkle of the drills — always test on a small corner or a spare canvas before committing to the full painting.
Whether you seal or not is a personal choice. Many crafters skip sealing entirely for paintings that will be framed under glass, since the frame provides sufficient protection.
Framing and Displaying Your Diamond Painting
A beautifully framed diamond painting genuinely looks like gallery-quality art. Here are your main options.
• Standard picture frames are the most popular choice. Measure your canvas dimensions carefully and choose a frame that fits. When installing the painting, most crafters remove the glass panel from the frame, as glass diffuses the sparkle of the diamonds. Instead, the canvas goes directly into the frame against the backing board. Alternatively, use a frame with an acrylic (plexiglass) panel, which is thinner and has less of a dulling effect.
• Canvas stretching involves mounting the completed painting over wooden stretcher bars, similar to a traditional stretched canvas painting. This gives the piece a clean, modern look without a frame border. It does require some skill to stretch evenly without distorting the grid.
• Wall hangings are a textile-forward display option where the canvas is attached to fabric backing and hung with a decorative rod. This works especially well for larger paintings with a bohemian or fiber-art aesthetic.
• Easel display works well for smaller paintings, particularly gifts. Standing easels in wood or metal allow the painting to be displayed on a shelf, mantel, or tabletop without wall mounting.
• Roll-up storage tubes are not a display method, but if you need to store a completed painting before framing, rolling it gently around a wide tube (drills facing outward to avoid crushing) is the safest option.
Diamond Painting as a Gift
Diamond painting kits make excellent gifts for creative people who enjoy hands-on activities. They are also increasingly popular as finished artwork gifts — a custom diamond painting created from a personal photograph of a pet, a family portrait, or a meaningful place is a deeply personal and impressive present.
When giving a kit as a gift, consider including a light pad if the recipient is new to the hobby — it makes the experience noticeably more comfortable. A quality storage organizer for drills and a sealer add practical value that an experienced crafter will appreciate.
Custom kits, where a personal photo is converted into a diamond painting canvas, are available from several specialty retailers. The quality varies significantly between vendors, so look for those who offer a preview of the converted symbol grid before you commit, and who use a high drill count (more colors) for better detail.
Custom Diamond Painting: Turn Any Photo Into Sparkling Art
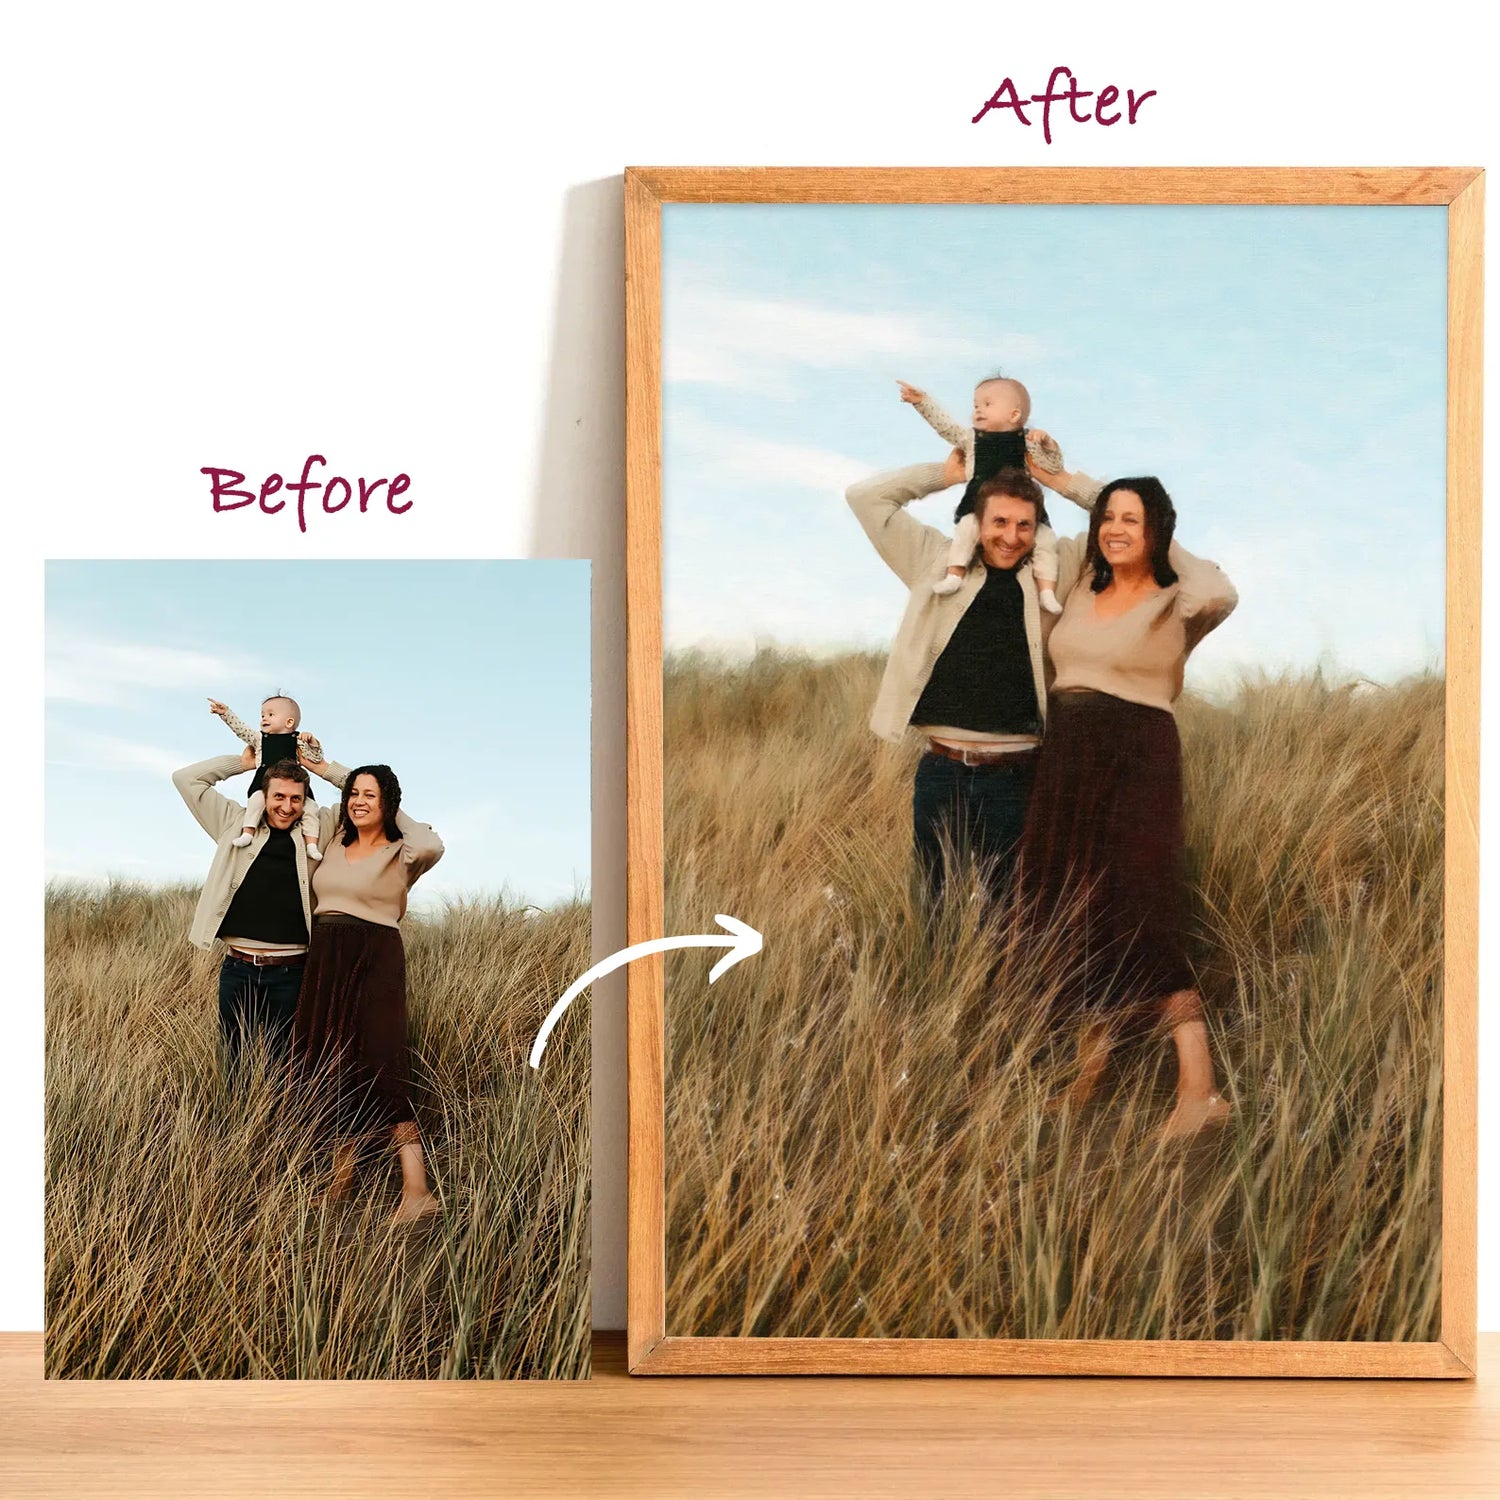
One of the most exciting developments in the diamond painting world over the past few years is the rise of custom kits. Instead of choosing from a catalog of pre-designed images, you can now upload any photo — a beloved pet, a family portrait, a wedding moment, a cherished landscape — and have it converted into a fully personalized diamond painting canvas.
The result is something genuinely special. A custom diamond painting of your dog, your children, or a place that holds deep meaning transforms the hobby from a relaxing pastime into an act of personal storytelling. It also makes for one of the most thoughtful and unique gifts you can give someone.
How Custom Diamond Painting Works
The process is straightforward. You upload a photo to a custom kit provider, and their team (or software) converts the image into a color-coded symbol grid mapped to DMC drill colors. You then receive a canvas printed with that grid alongside all the corresponding diamond bags needed to complete it — exactly like a standard kit, but built entirely around your image.
Most reputable providers will show you a digital preview of what the converted design will look like before production begins. This step matters enormously: not every photo converts equally well, and a good preview lets you assess the detail level and request adjustments before anything is printed.
Choosing the Right Photo
Photo selection is the single biggest factor in how satisfying your custom kit will be. Here is what makes a good source image.
• High resolution is essential. A sharp, well-lit photo will convert into a detailed, recognizable design. A blurry, dark, or low-resolution image will produce a muddy symbol grid that loses important detail — especially in faces.
• Simple, high-contrast compositions work best. Images with a clear subject against a relatively uncluttered background translate beautifully. Busy backgrounds with many competing elements can result in a finished painting that looks confusing rather than cohesive.
• Lighting matters. Photos taken in natural daylight with the subject well-illuminated produce the most accurate color reproduction. Harsh shadows across a face, for example, can become dark blocks of color that obscure features in the finished design.
• Close-up shots of pets and people tend to produce the most emotionally impactful results. The face — or the eyes in particular — is often the focal point that makes a custom painting feel alive and personal. Make sure the face is sharp and well-lit in the source photo.
• Avoid images with very fine detail that would be lost at the drill scale. Intricate text, thin jewelry chains, and delicate background foliage rarely survive the conversion process intact. Simplicity and boldness translate best.
What to Look for in a Custom Kit Provider
Not all custom services are equal, and quality varies widely in this space. Here are the things worth checking before you place an order.
• Look for a preview before production. Any provider worth using will show you the converted grid design before printing the canvas. This gives you the opportunity to approve the image, request color adjustments, or choose a different photo if the conversion is not what you hoped for.
• Check the drill color count. More DMC colors in the kit means more nuance and detail in the finished painting. Budget custom kits often limit you to 25–35 colors, which can result in blocky, flat-looking faces. Higher-quality services offer 50–80+ colors, producing far more realistic gradients and depth.
• Assess canvas size options. A custom painting needs to be large enough for the detail in your photo to be legible. For a portrait with a recognizable face, a minimum of 40x50cm is recommended. Smaller sizes compress too many colors into too few drills, and fine features become indistinct.
• Read reviews from previous customers. Pay particular attention to comments about how well the finished painting resembles the original photo.
• Ask about canvas coating quality. Custom canvases are produced in smaller, more variable batches than standard designs, and adhesive quality can vary. A canvas whose adhesive dries out before you finish working is a miserable experience — look for providers who use high-tack, long-lasting adhesive layers.
Tips for Getting the Best Result from a Custom Kit
• Work the face or focal point first. In a portrait, the eyes and face are what make the painting recognizable. Starting there means any initial learning curve in your technique happens on the most important area, while it is still easy to adjust.
• Pay close attention to color transitions. Custom designs often include subtle gradients — the shadow under a cheekbone, the shading in fur, the depth of a sky — that require careful color matching. Take your time in these areas and lay out all the relevant DMC bags before starting a gradient section so you can see the sequence clearly.
• Use a light pad. The symbol grids on custom canvases can be particularly dense and complex, with many similar-looking symbols representing closely related colors. A light pad makes reading the grid significantly easier and reduces misplacement errors in detailed sections.
• Do not rush the finishing and framing. A custom painting deserves a beautiful frame. Measure carefully, choose a frame that complements the image, and consider having the finished piece professionally framed if it is intended as a long-term display piece or a meaningful gift.
Custom Diamond Paintings as Gifts
A custom diamond painting is in a different category from most gifts. It takes something personal — a photo the recipient loves — and transforms it into a handmade piece of sparkling art. Whether the subject is a much-loved pet that has passed away, a couple's wedding photo, a grandparent's portrait, or a child's first professional photo, the combination of personal meaning and visual impact makes it an unusually powerful gift.
For gift-giving purposes, you have two options: you can order a completed custom painting (have it made and framed as a ready-to-hang piece), or you can give the kit itself so the recipient experiences the joy of making it themselves. The latter works especially well for friends and family members who already enjoy diamond painting — receiving a custom kit of their own pet or a beloved photo is a deeply personal experience.
Frequently Asked Questions
How long does a diamond painting take?
This depends entirely on the size and complexity of the design, and your own working pace. A small 20x20cm painting might take 3–5 hours. A 40x50cm painting typically takes 15–25 hours spread across multiple sessions. Large full-coverage paintings can take 50–100+ hours.
Is diamond painting suitable for children?
The drills are small and present a choking hazard for very young children. Most crafters recommend diamond painting for ages 8 and up, with supervision. There are junior kits designed for younger crafters that use larger, easier-to-handle elements.
Can I create a diamond painting from my own photo?
Yes. Custom diamond painting services convert any image into a canvas kit. Quality varies by provider, so research reviews and look for companies that show you a symbol grid preview before production.
How do I fix a mistake?
Use tweezers to lift and reposition any incorrectly placed drill. On un-pressed sections this is easy. On pressed sections it requires more care but is still usually possible with patience.
Do I need to seal my diamond painting?
Sealing is optional but recommended for any painting that will be handled frequently, displayed in humid environments, or left without a protective frame. It significantly increases the longevity of the piece.
What do I do with leftover drills?
Store them labeled by DMC code. They can be used to fill gaps if any drills are lost, repurposed in other craft projects, or traded within the diamond painting community.
My canvas adhesive seems weak — what can I do?
Work in smaller sections, keep the protective film over any area you're not actively working on, and keep the workspace free of lint and pet hair. A final hard press with a rolling pin will maximize adhesion. If specific spots remain problematic, a tiny amount of clear-drying craft glue can reinforce individual drills.
Final Thoughts
Diamond painting is one of those rare hobbies that delivers rewards almost immediately — from the satisfying click of a drill pressing into place to the gradual reveal of a shimmering image — while also offering depth and complexity for those who want to keep growing within it. Whether you paint for relaxation, for creative expression, or to produce meaningful gifts and home décor, it is a hobby that fits easily into real life.
If you're ready to start, choose a design that genuinely excites you, pick a manageable size, and give yourself permission to take your time. Your first diamond painting won't be perfect, and it doesn't need to be. What it will be is something you made entirely by hand — one tiny, sparkling diamond at a time.